 By
By Controlling External Lights in a Photo Booth with Social Booth and a Phidget Relay
This month we have a fantastic guest post by Elliott Gosling from Party Photobooth Hire. Elliott has been a Social Booth customer since the beginning and has shared some great info about using a Phidget relay to control external lights while using Social Booth.
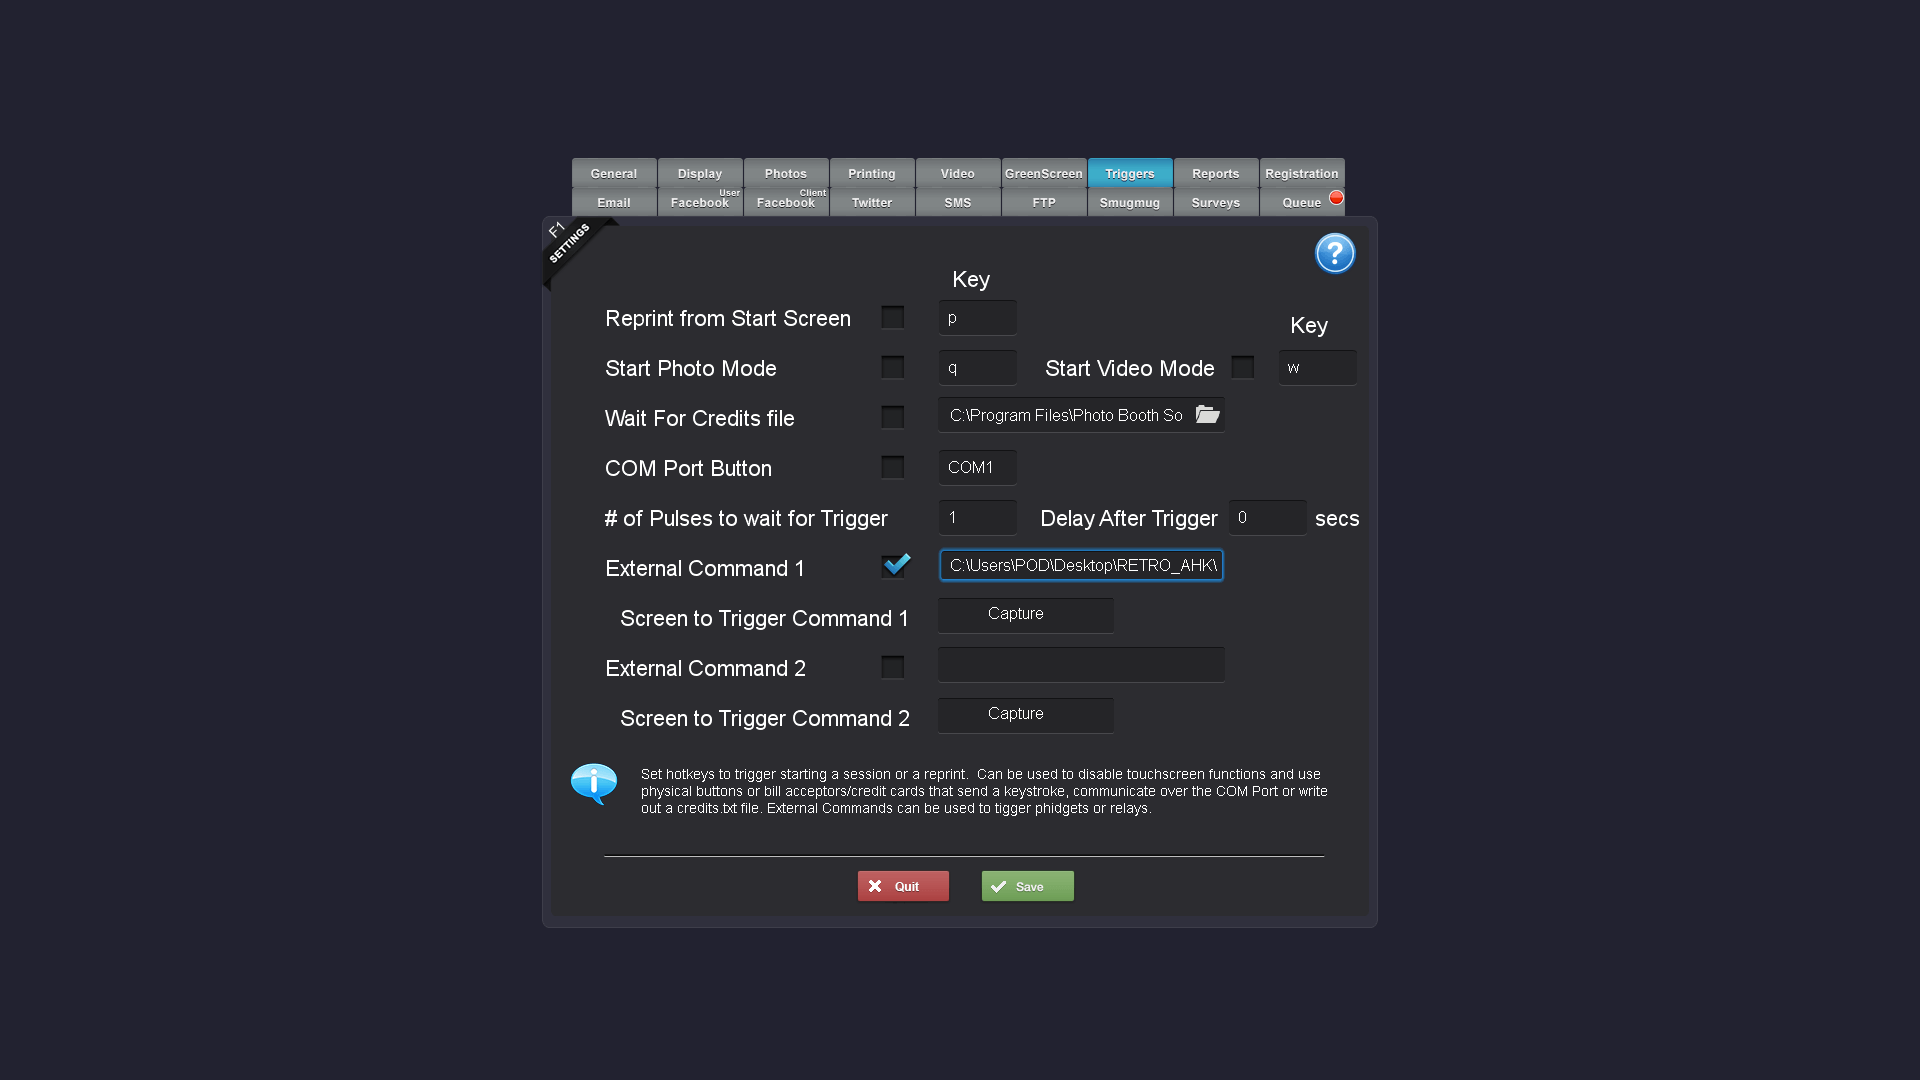
One of the features that I imagine not many people know about or use within Social Booth is the ability to run up to two external commands triggered by screen changes. This is a great feature which means relays and phidgets can be executed from within Social Booth to allow you to interface external devices.
Why I needed this feature…
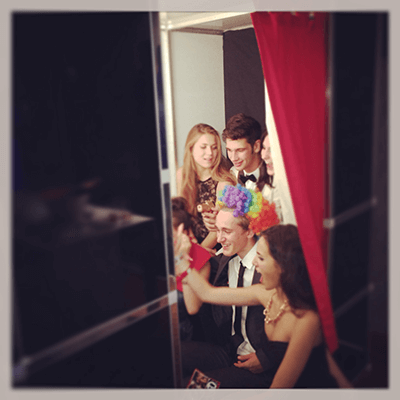
So we have all been there before, that old problem of the users never looking at the lens, I have tried vinyl arrows with “look here” in the booth pointing to the lens, arrows on the screen during the countdown, big coloured vinyl circle around the lens with little or no results either because they don’t see them or they are too transfixed on the camera feed of themselves look up in time. My solution is to add ring lights around the lens. Now I could have chosen to just have a light always on or use a flashing light but I don’t think they will help that much as there is no indication of when the picture is being taken and when to look. So I decided that I need two different lights, one to signify the countdown and another to let them know when it’s about to be taken. The only way to achieve this is with the ability to turn the lights on and off at specifics points in the photo booth sequence, and that is where the external commands feature comes in.
Here I’ll talk you through how I use a Phidget together with Autohotkey (AHK) and Social Booth to control these coloured ring lights around the lens…
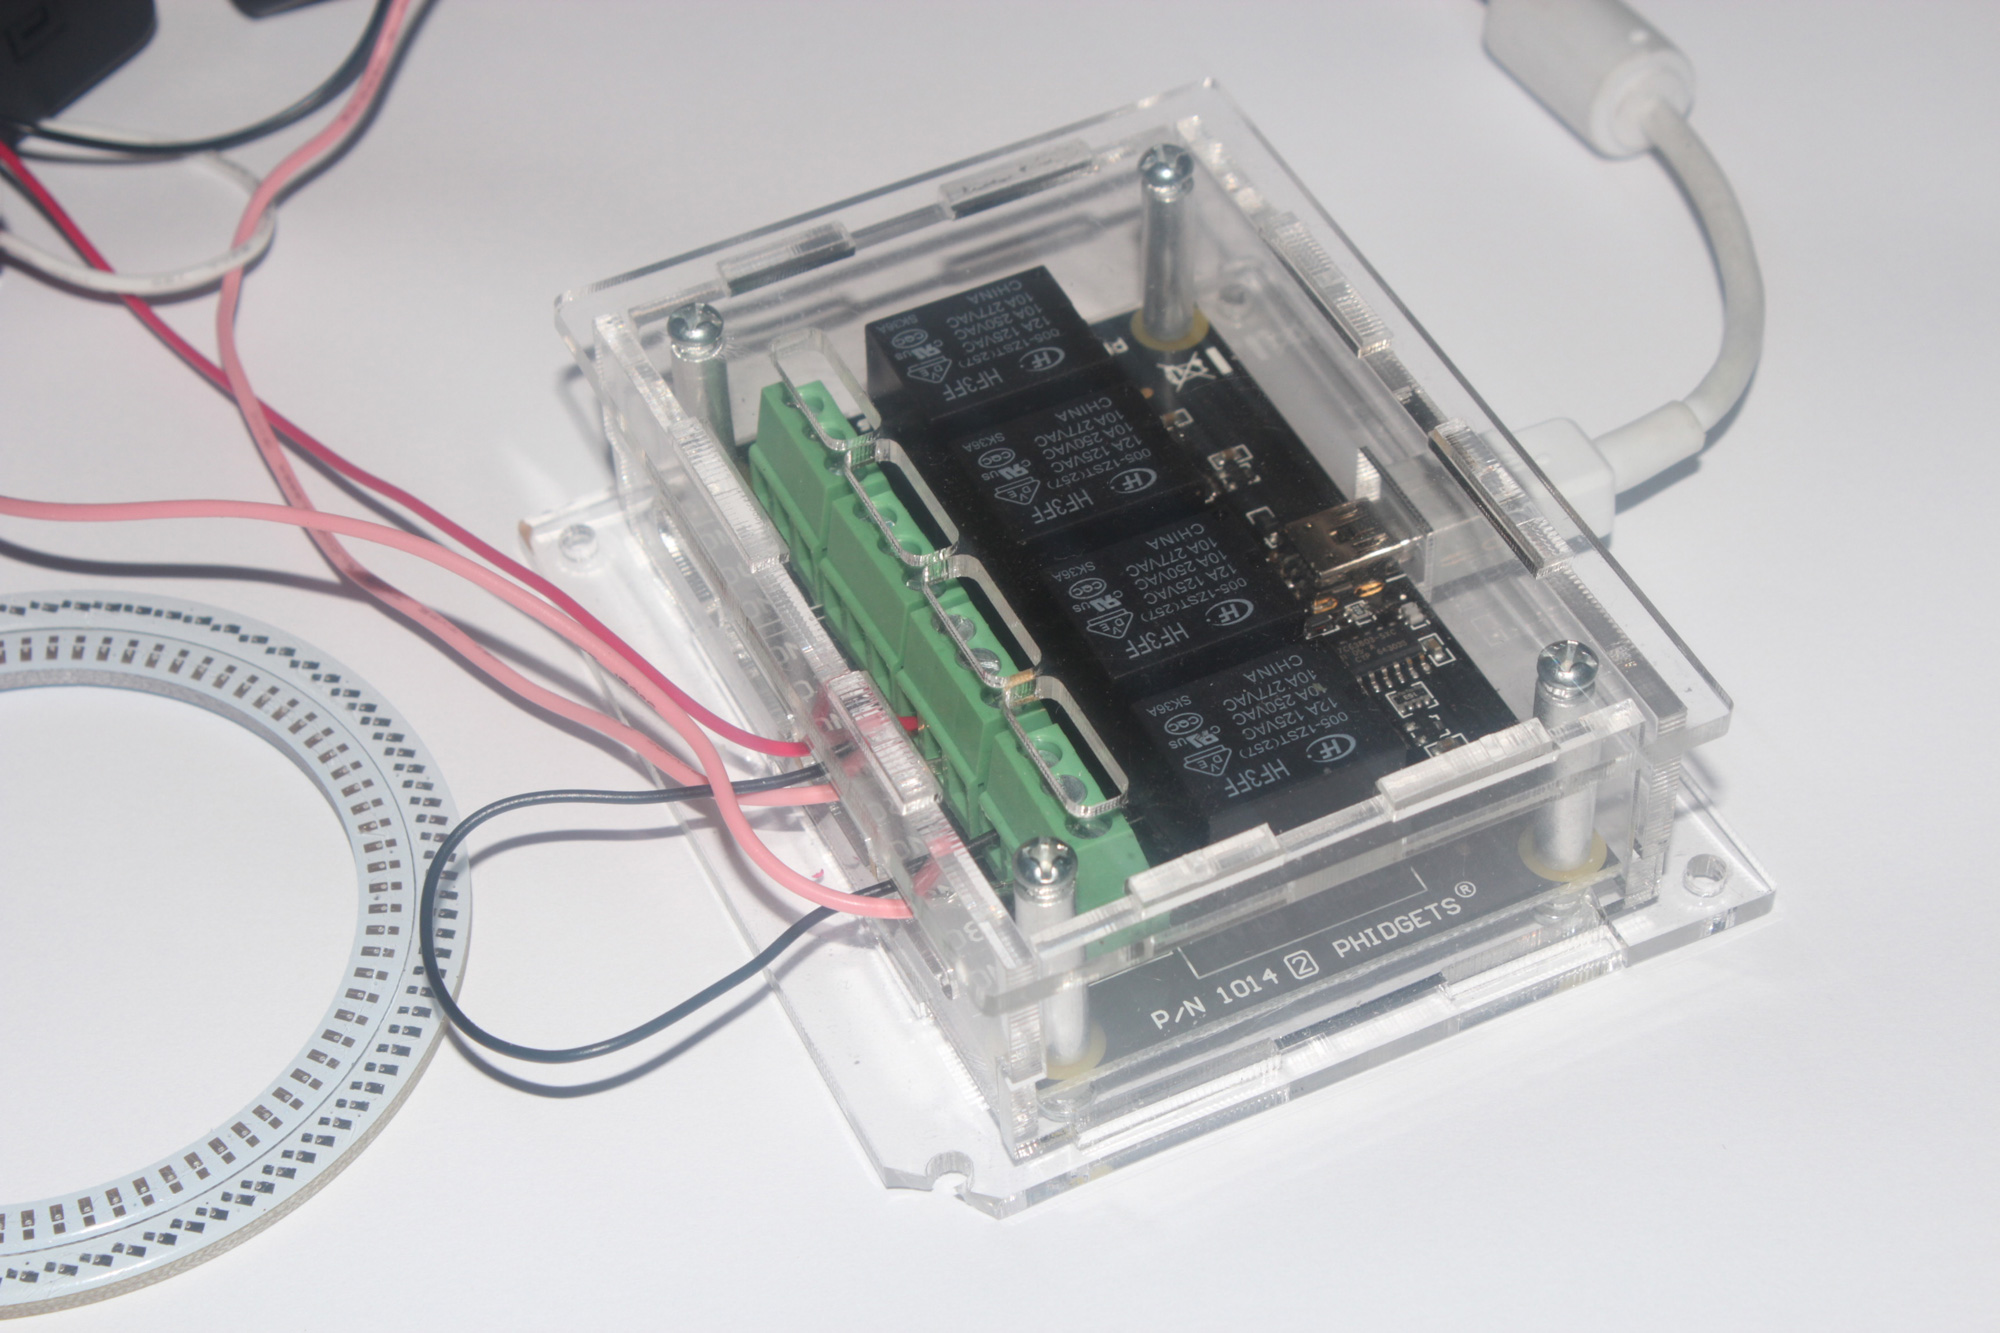
A Phidge who?
A Phidget or this case a “1014 PhidgetInterfaceKit 0/0/4” is my tool of choice for switching on/off electrical devices via the PC’s USB. It’s basically a relay that can be controlled via the PC either directly through Phidget’s interface or more importantly via Phidget’s drivers and coded into other programmes (for me AHK). This will cost you around $60/£60 and is available from www.phidgets.com in North America or www.active-robots.com in the UK. I would also advise getting the acrylic case for it too.
Autohotkey (AHK)
The other thing you will need for this project is a copy of autohotkey which is a free open source utility that allows you automate via hotkeys, mouse clicks and in my create scripts to control the phidget, it is available from http://www.autohotkey.com. For me the only coding I have ever done prior to using AHK was a bit of HTML, javascript, CSS, actionscript in Flash and lingo in Director so this was again a new one to learn and get my head around, if you like logic it’s fine! But in all honesty it’s not too bad and for I what need fairly easy to hash together and modify.
Let there be light
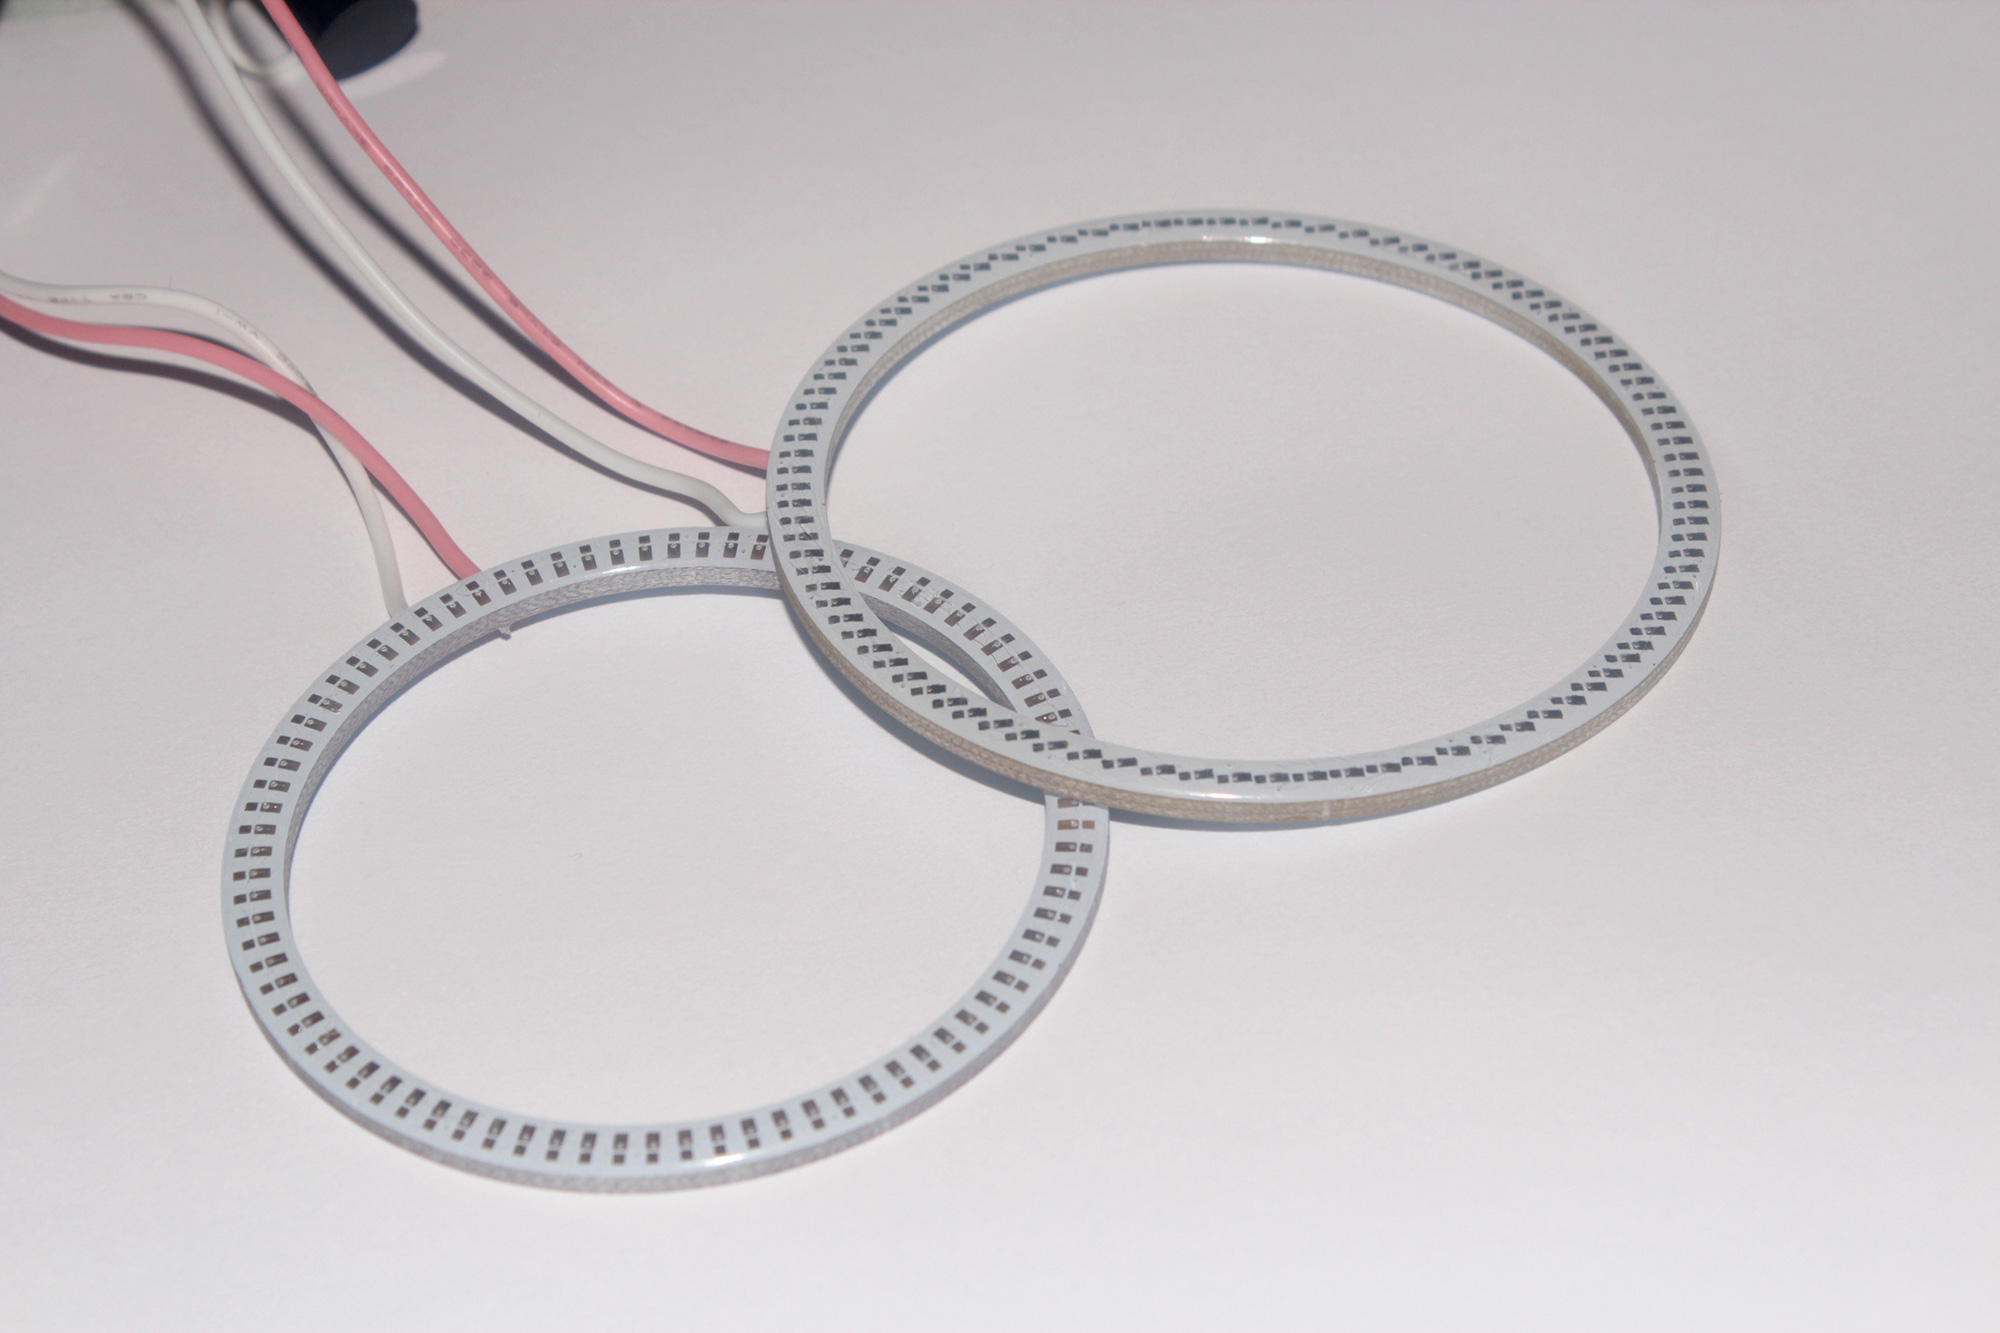
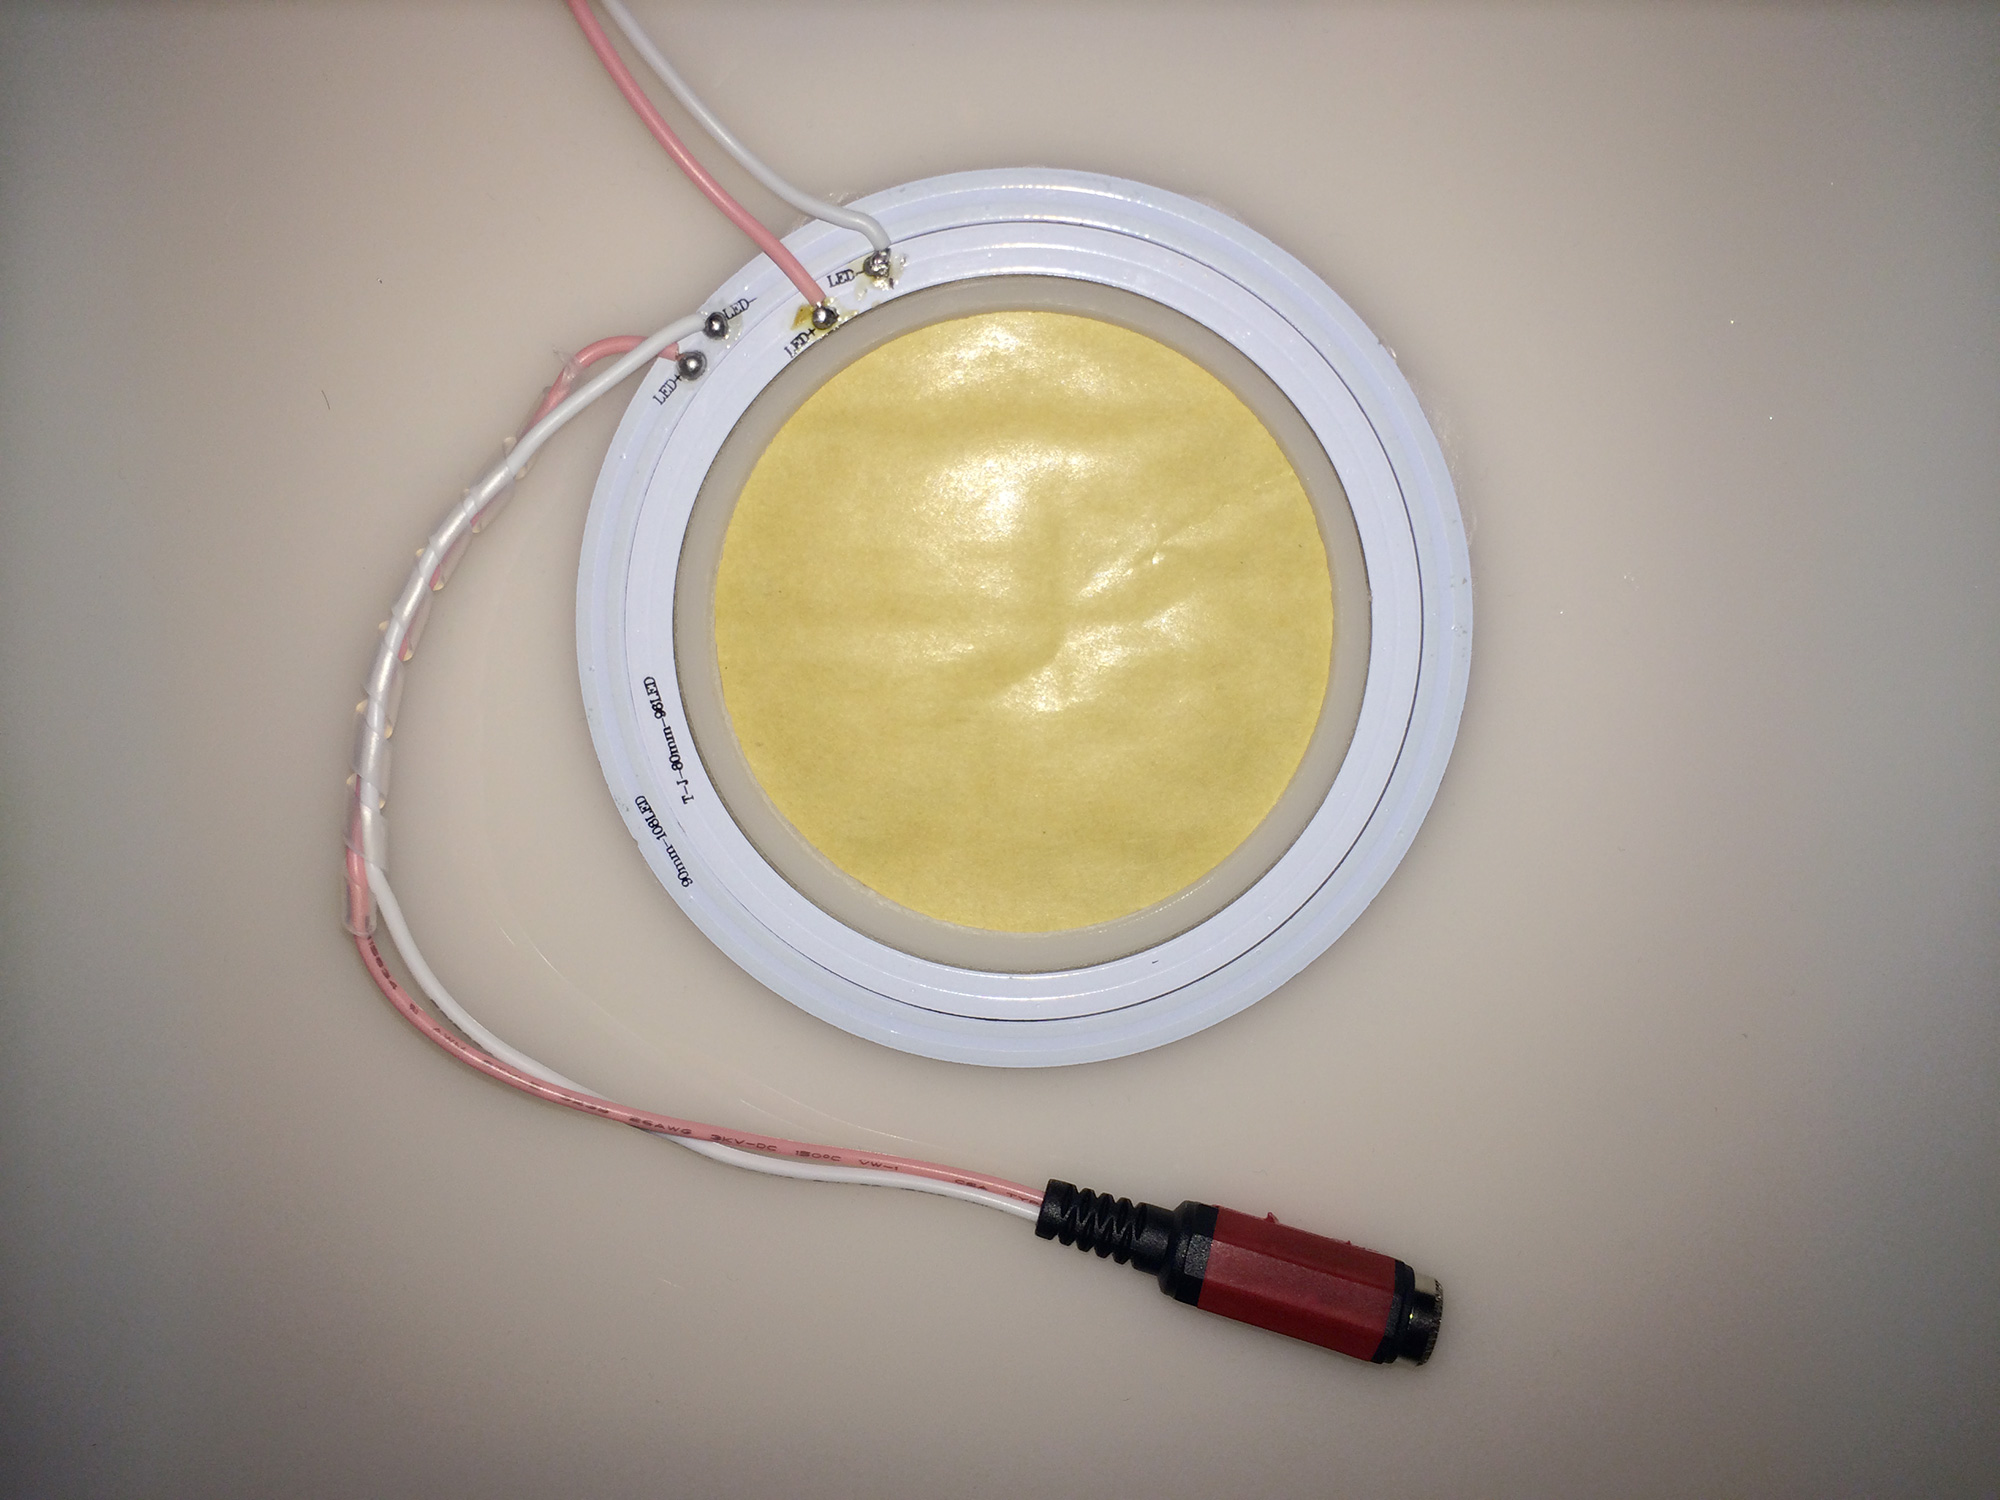
For the actual lights I turned to LED rings or “angel eyes” as they are marketed as for the automobile industry. I needed two lights that would fit inside one and another and be two different colors (ideally a red for the countdown and a green for the taking). In the end I found what I wanted on good old eBay from a UK seller (being based in the UK I didn’t fancy waiting three weeks to get some from Hong Kong or pay the expensive shipping from the US). They were perfect, the lights are 360º so no breaks like some and the diodes have a coating over them making them clean to mount to the plexi. I got a red in 90mm and a blue in 80mm.
For the testing stage I wired them as they were into the Phidget and powered them with a 9V battery. For the actual mounting in the booth they would be powered by a single 12V supply and I would be modifying them with power connectors so the panel they are attached to can be stored without needing to be plugged into the phidget.
Let the coding commence
In order for me to use them in social booth I needed to create an AHK script that Social Booth will run at the appropriate screen. This was the first challenge as Phidget on their website give examples how to get it working in what seemed like every other scripting language except AHK. So doing a search online I came across a post on the AHK forums where someone else had worked out how to turn a channel on the phidget on and off. This was all I needed to get started.
My script for lights is then very basic and does the following;
- Opens a connection to the phidget
- Turns the red ring light on and off for a set number of seconds (creating a flashing effect during the countdown)
- Turns the blue ring light on for a few seconds then off again (so that it comes on just before the picture is taken and goes off just after).
And that’s it, the timings I used for the lights was based on the countdown setting I use in Social Booth. A quick test by running the script on it’s own worked and my lights did indeed come on and off as intended.
Houston we have a problem…
Now all I needed to do was add the file path of this script to Social Booth’s external command space in the triggers tab and select “capture” for the desired screen and I should be home and dry, or not as the case was. What I didn’t realise was that when a command is run Social Booth pauses until the command has completed; which in this case meant that the red light came on when the countdown started and continued it’s sequence of flashing followed by the blue light but the countdown paused until the lights had finished. This was no good as I needed them to run in tandem. The solution was to create a new AHK that simply is set to launch the first ahk. This way all the new AHK is doing is telling the other script to start so Social Booth isn’t going to wait for the lights command to finish before it moves on (I hope that makes sense). So now in Social Booth I put the filepath of this new script and Bobs your Uncle it worked when tested!
So now I know it works just a matter of adding the phidget into my booth and attaching the lights with plastic adhesive to the plexi and adding the connectors
AHK Script Download
You can download the final AHK scripts here.
Tips
Here’s a few tips for you if you are thinking of adding external interfaces to Social Booth using my method…
- Use the AHK forums, there are some very helpful people out there who will help you out with your code if you are stuck.
- Speaking of AHK I have included a download of my scripts for the lights to give you an idea of how they are controlled with the Phidget via AHK.
- Compile your completed scripts as .exe files so that you can use them on any PC that hasn’t got AHK installed and so you can’t accidently edit them (though the PC used will need the phidget drivers installed)
- If you are using led ring lights like these be wary if you aren’t using a strobe or flash but are just using a continuous light to take the pictures as the colored LED lights may interfere with your exposure and white balance!
Taking it further…
Once you have that mastered and can get Social Booth interfacing with external devices there’s lots of potential, you could have lights come on at the end of the session in the print collection slot, or if you do a video booth how about an “ON AIR” light so people outside know it’s occupied and recording in progress or if you use a webcam use bright white LEDs to create a flash effect so people know a pic has been taken (just have it flash at the review screen after the pic has taken instead)
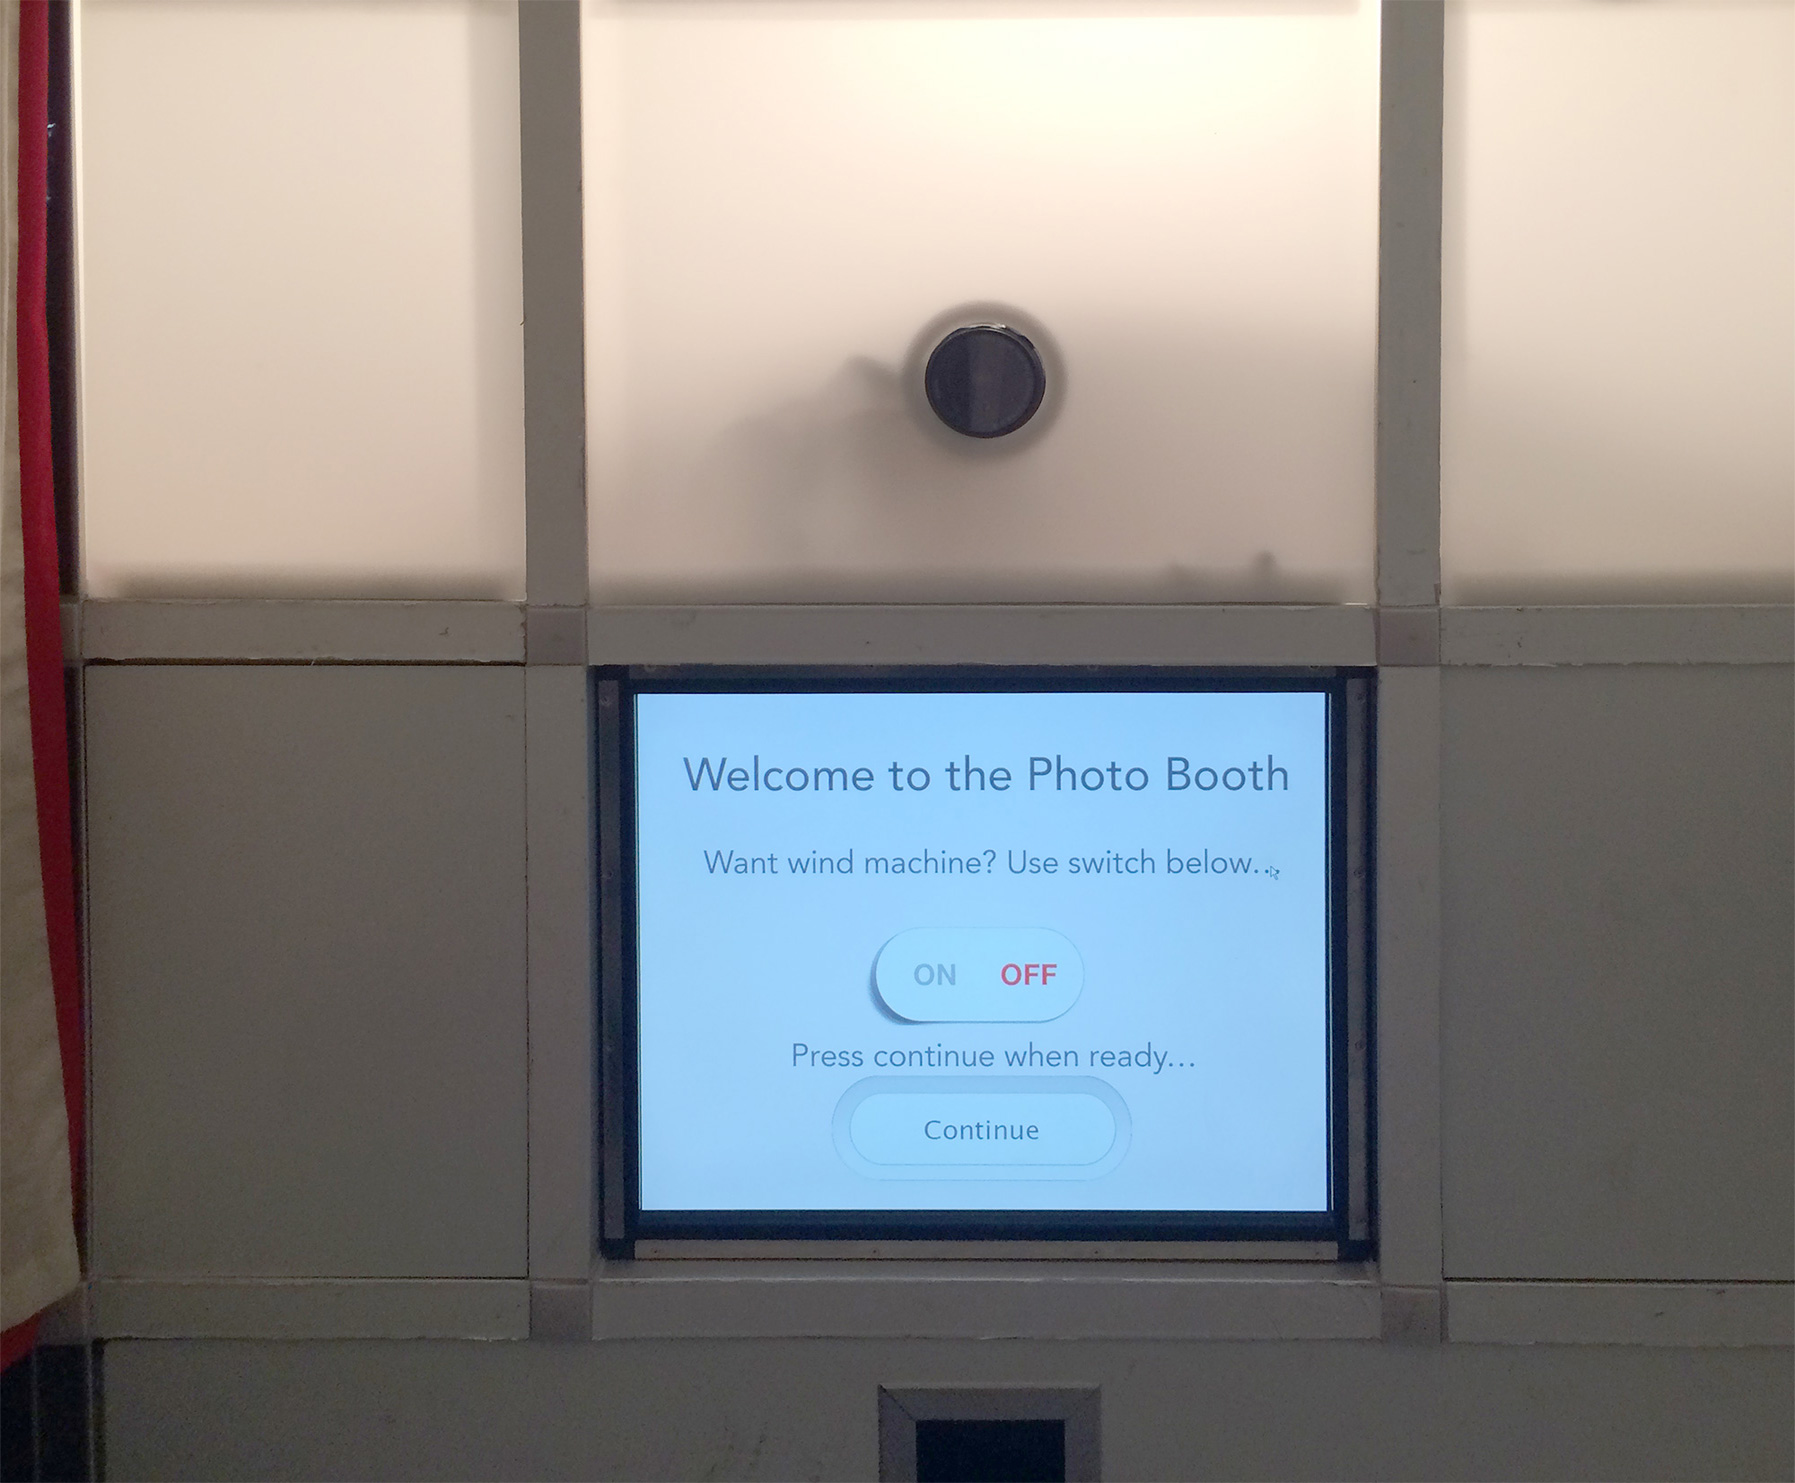
In my next guest blog I will tell you how I used the same principles and a bit more advanced AHK to create a new screen that hides Social Booth so the users can choose to turn on a wind machine direct from the touch screen for their session as can be seen in the image below.
Hope that helps and encourages you to give the external commands feature a go!